# How to set up a remote Airsonic music server
## Introduction
In today's digital landscape, cloud-based audio services have become the go-to choice for many individuals seeking convenient access to their music. However, these solutions often fall short when it comes to providing access to personal audio files stored on separate devices. This limitation emphasizes the importance of finding a solution that grants users full control over their audio streaming experience, leading many to explore the option of setting up their own music servers.
[Airsonic](https://airsonic.github.io/) is a self-hosted, free, and open-source application that enables you to easily configure a personal music server. This tool is optimized for various audio formats and large music collections. While self-hosting a server can be an exciting learning experience, setting up secure remote access may be the opposite.
Tinkering with [port forwarding](https://nordvpn.com/blog/port-forwarding/) or looking for available domain names can be tedious work. With [Meshnet](https://nordvpn.com/meshnet/), you can allow remote connections to your server without any difficult networking configurations. In addition, you do not have to expose any ports on your server.
This guide contains instructions on how you can set up your own Airsonic music server on Windows, macOS, and Linux devices using Docker, and access the server remotely using Meshnet.
## Prerequisites
To follow this guide, you must have [Docker](https://docs.docker.com/get-started/overview/) and [Docker Compose](https://docs.docker.com/compose/) installed on your device. Instructions on how to download and install these tools can be found on the Docker website:
* [Docker Desktop instructions for Windows](https://docs.docker.com/desktop/install/windows-install/)
* [Docker Desktop instructions for macOS](https://docs.docker.com/desktop/install/mac-install/)
* [Docker Desktop Instructions for Linux](https://docs.docker.com/desktop/install/linux-install/)
* [Docker Engine instructions for Linux (CLI only)](https://docs.docker.com/engine/install/)
* [Docker Compose instructions for Linux (CLI only)](https://docs.docker.com/compose/install/linux/)
{% hint style="info" %}
**Note**
Docker Compose comes pre-installed with Docker Desktop.
{% endhint %}
## Deploy Airsonic using Docker
With Docker and Docker Compose installed, you can begin setting up your Airsonic music server. Running the Airsonic server as a Docker container requires fewer resources than a standalone installation. Besides, you can easily make changes to the server’s configuration by adjusting the Docker Compose file and restarting the container.
### Creating a Docker Compose file
First, you need to create a Docker Compose file that contains the deployment instructions for the Airsonic Docker container.
{% tabs %}
{% tab title="Windows" %}
To create a Docker Compose file for Airsonic on Windows:
1. Open **PowerShell**.
2. Run the following command to create a new `airsonic` folder with a `data` subfolder, and then navigate to the `airsonic` folder:
mkdir airsonic/data; cd airsonic
3. Create a `docker-compose.yml` file and open it using Notepad with the following command:
notepad docker-compose.yml
\
When prompted to create the file, click **Yes**.\
\

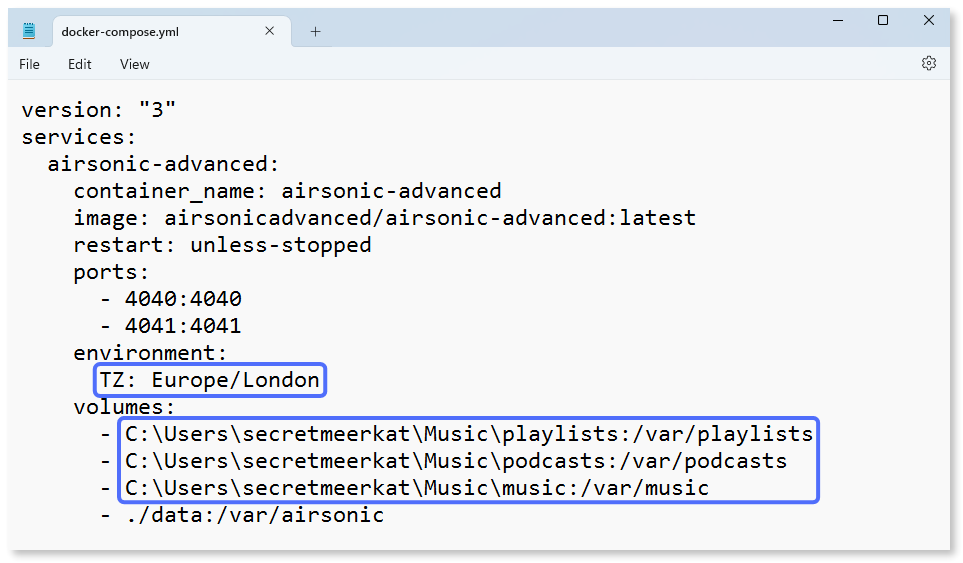
4. In the Notepad window, paste the following information containing instructions for the [Airsonic-advanced Docker container](https://hub.docker.com/r/airsonicadvanced/airsonic-advanced):
version: "3"
   services:
     airsonic-advanced:
       container_name: airsonic-advanced
       image: airsonicadvanced/airsonic-advanced:latest
       restart: unless-stopped
       ports:
         - 4040:4040
         - 4041:4041
       environment:
         TZ: <YourTimezone>
       volumes:
         - <\path\to\music>:/var/music
         - <\path\to\playlists>:/var/playlists
         - <\path\to\podcasts>:/var/podcasts
         - ./data:/var/airsonic
5. Replace the placeholders with the values appropriate for your setup:
* Instead of ``, enter your [time zone](https://en.wikipedia.org/wiki/List_of_tz_database_time_zones).
* Instead of `<\path\to\music>`, enter the path to your music folder.
* Instead of `<\path\to\playlists>`, enter the path to your playlists folder.
* Instead of `<\path\to\podcasts>`, enter the path to your podcasts folder.\
\
**Example**
6. Press **Ctrl** + **S** to save changes.
7. Exit **Notepad**.
{% endtab %}
{% tab title="macOS and Linux" %}
To create a Docker Compose file for Airsonic on macOS and Linux:
1. Open **Terminal**.
2. Run the `id` command to find the `uid` and `gid` values for your user account.
3. Run the following command to create a new `airsonic` folder with a `data` subfolder, and then navigate to the `airsonic` folder:
mkdir -p airsonic/data && cd airsonic
4. Create a `docker-compose.yml` file and open it using the Nano text editor with the following command:
nano docker-compose.yml
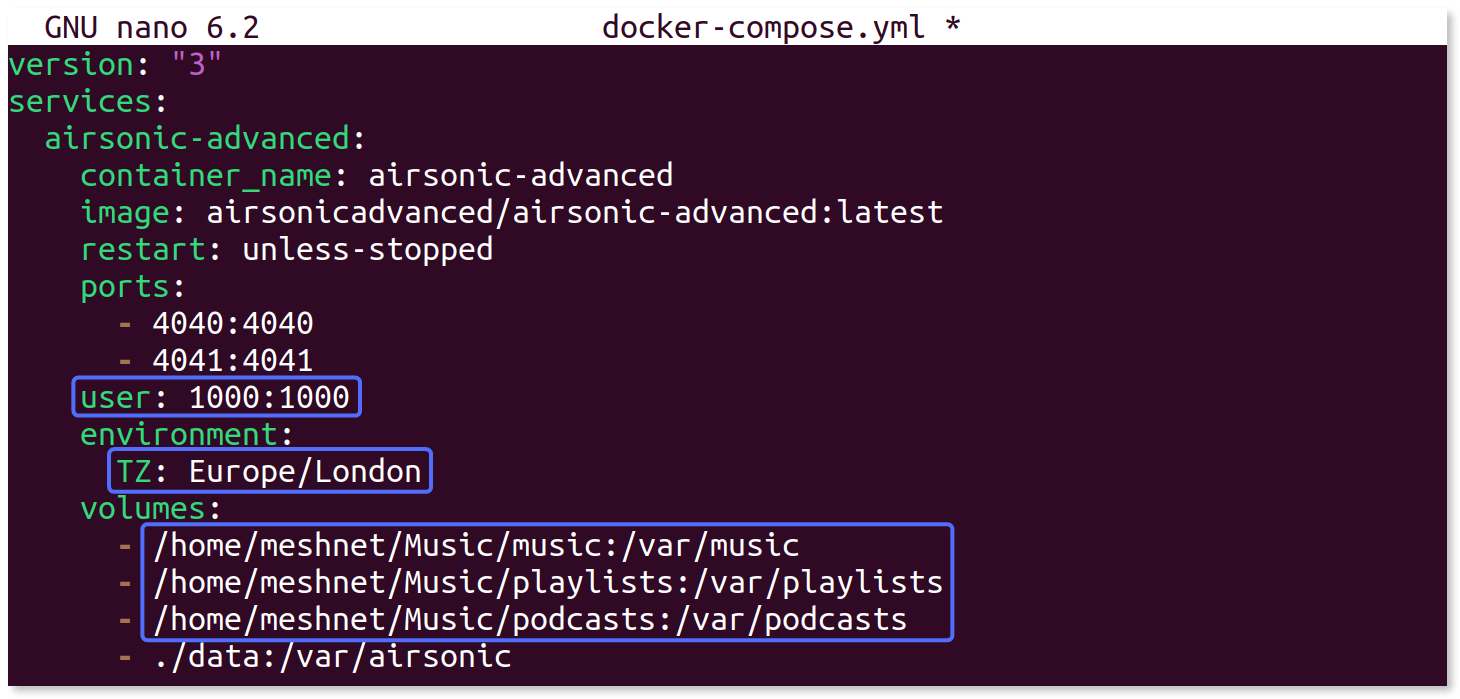
5. In the terminal window, paste the following information containing instructions for the [Airsonic-advanced Docker container](https://hub.docker.com/r/airsonicadvanced/airsonic-advanced):
version: "3"
   services:
     airsonic-advanced:
       container_name: airsonic-advanced
       image: airsonicadvanced/airsonic-advanced:latest
       restart: unless-stopped
       ports:
         - 4040:4040
         - 4041:4041
       user: <UID>:<GID>
       environment:
         TZ: <YourTimezone>
       volumes:
         - </path/to/music>:/var/music
         - </path/to/playlists>:/var/playlists
         - </path/to/podcasts>:/var/podcasts
         - ./data:/var/airsonic
6. Replace the placeholders with the values appropriate for your setup:
* Instead of `` and ``, enter your user account’s values from Step 2.
* Instead of ``, enter your [time zone](https://en.wikipedia.org/wiki/List_of_tz_database_time_zones).
* Instead of ``, enter the path to your music folder.
* Instead of ``, enter the path to your playlists folder.
* Instead of ``, enter the path to your podcasts folder.
**Example**
7. Press **Ctrl** + **X**, **Y**, and **Enter** to save changes and exit.
{% endtab %}
{% endtabs %}
### Starting the Airsonic container
With the Compose file created, while in the `airsonic` directory, execute the following command in the command line to create your Airsonic instance:
{% code overflow="wrap" %}
```bash
docker-compose up -d
```
{% endcode %}
Docker will [pull the Airsonic-advanced image](https://docs.docker.com/engine/reference/commandline/pull/) from Docker Hub and create the container.
You can run the `docker ps` command to check if your Airsonic container is up and healthy.
## Access the Airsonic web interface
Now that the server is active, you can control all of its settings using the Airsonic web interface. To access the web interface:
1. Open your internet browser.
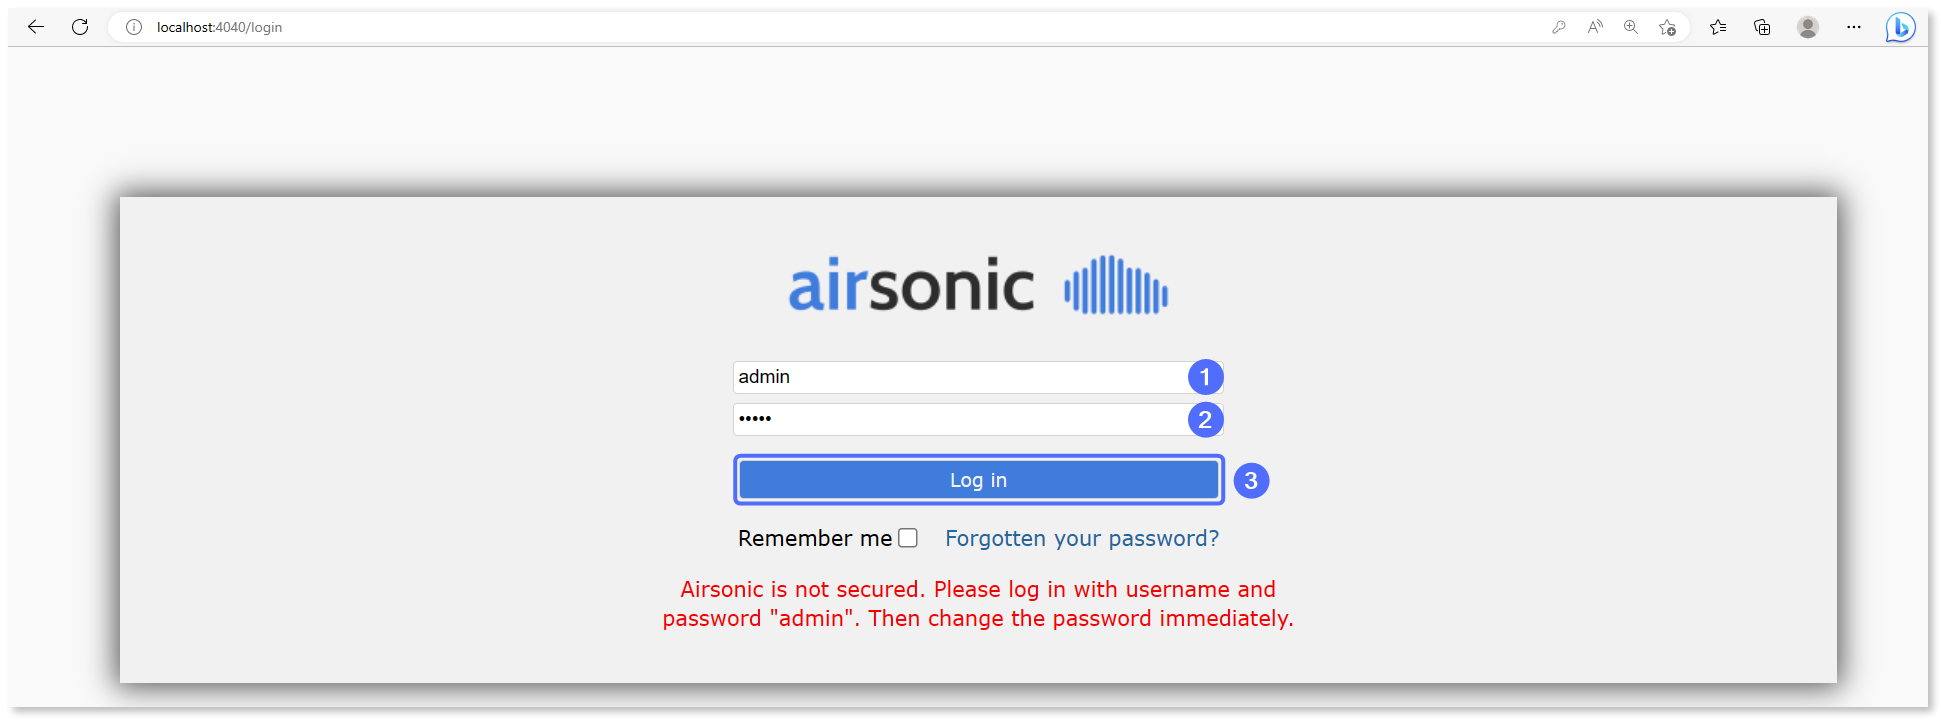
2. Navigate to the following URL:\
`localhost:4040/login`
3. In the **Username** and **Password** fields, enter `admin` and click **Log in**.
Upon logging in, you will be redirected to the Airsonic “Getting started” page. You can disable this page by clicking **Don’t show this again**.
### Updating the administrator account credentials
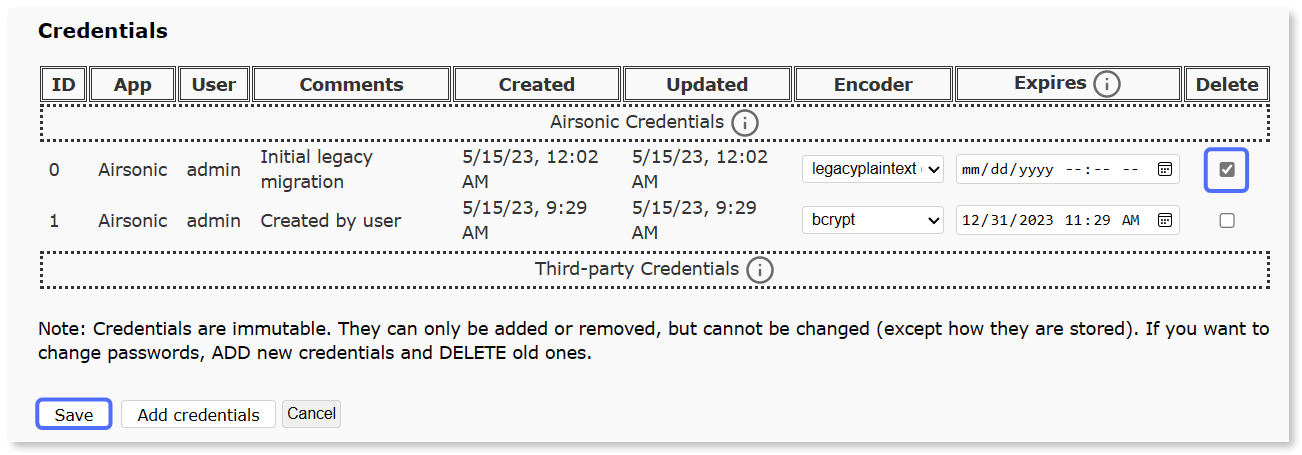
It is essential to secure administrator access to your Airsonic instance with strong credentials. To update the login details for the administrator account:
1. In the upper-right corner, click **admin** and select **Credentials**.
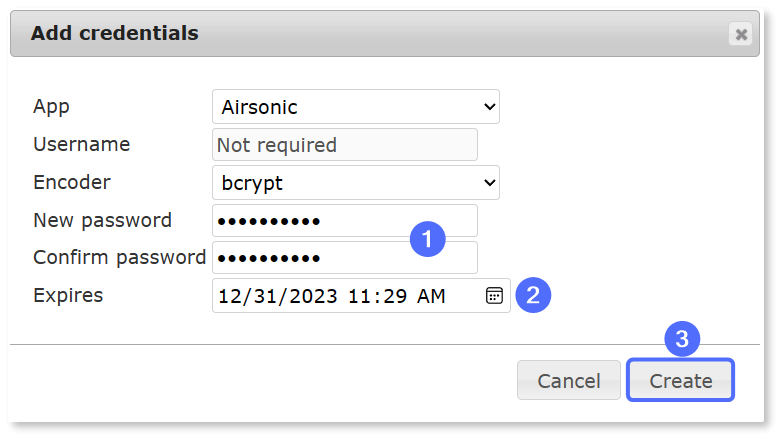
2. Click **Add credentials**.
3. Enter your new password twice, select its expiry date, and click **Create**.
4. In the **Credentials** table, next to the initial entry, select the **Delete** checkbox and click **Save**.
The old default credentials are now removed and administrator access to your Airsonic instance is secured with the newly created password.
### Creating new user accounts
Using an administrator account for standard access is not recommended, especially if you plan to share the server with your peers. Airsonic allows you to create new accounts with specific permissions. This way, you can be sure that no accidental changes to the server will be done.
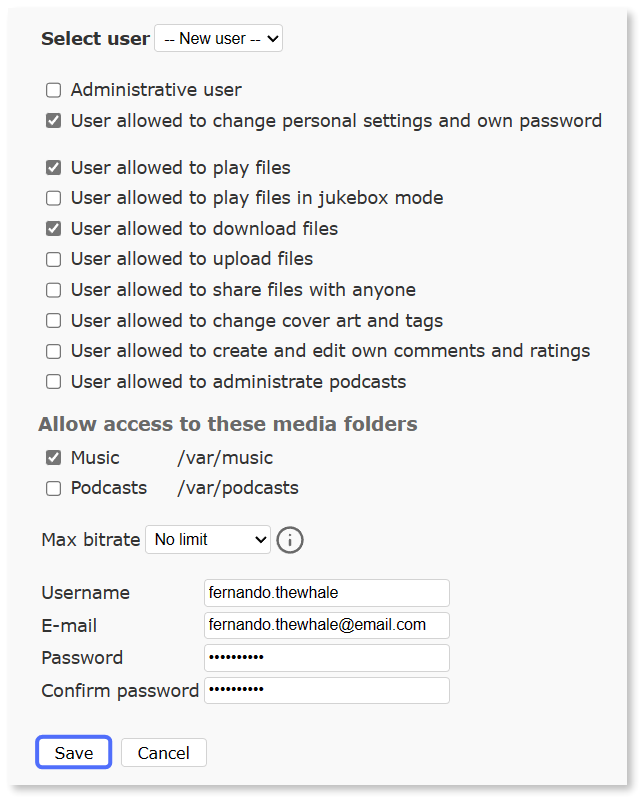
To create a new user:
1. Go to Airsonic **Settings** and select **Users**.
2. Make sure that **New user** is chosen next to **Select user**.
3. Select the appropriate permissions and access to media folders for the new user.
4. Enter the username, email address, and password of the new user.
5. Click **Save**.
The new user account is now created.
## Connect to Airsonic over Meshnet
With your Airsonic server fully set up, you can use it remotely over Meshnet.
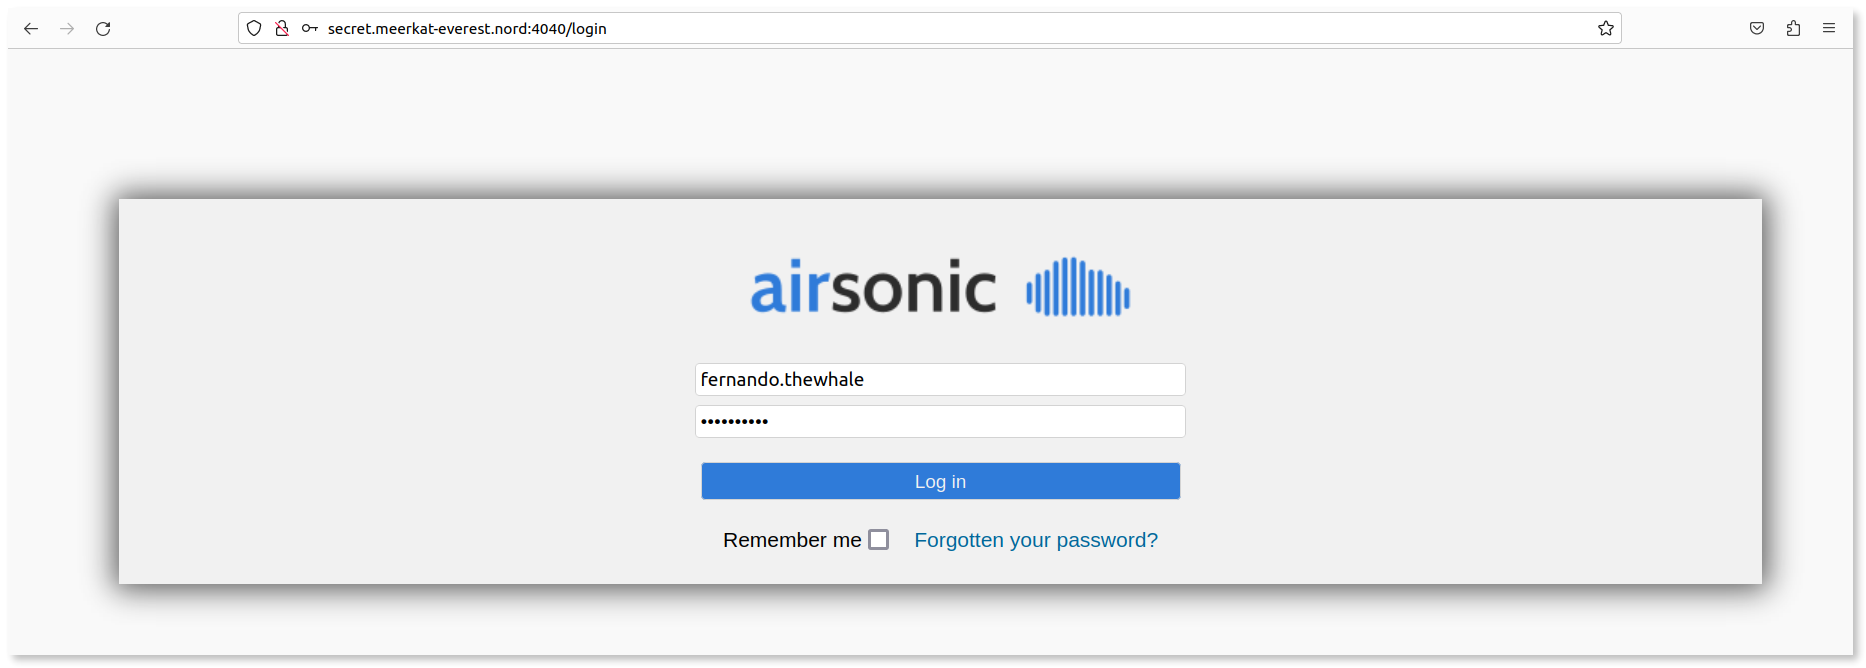
### Method 1: Using an internet browser
The easiest method to access your audio files stored on the Airsonic server is using an internet browser.
1. Copy the Nord name of your Airsonic server from the NordVPN application.
2. Open your internet browser.
3. In the URL field, paste the copied Nord name followed by `:4040/` and press **Enter**.
**Example**\
`secret.meerkat-everest.nord:4040/`
4. Log in to your Airsonic account.
Now you should have full access to your Airsonic music library while being away from home.
### Method 2: Using mobile apps
You can also use Airsonic-compatible apps to conveniently access and listen to your audio library. A list of compatible apps is available on the [Airsonic applications documentation](https://airsonic.github.io/docs/apps/) page.
{% tabs %}
{% tab title="Android" %}
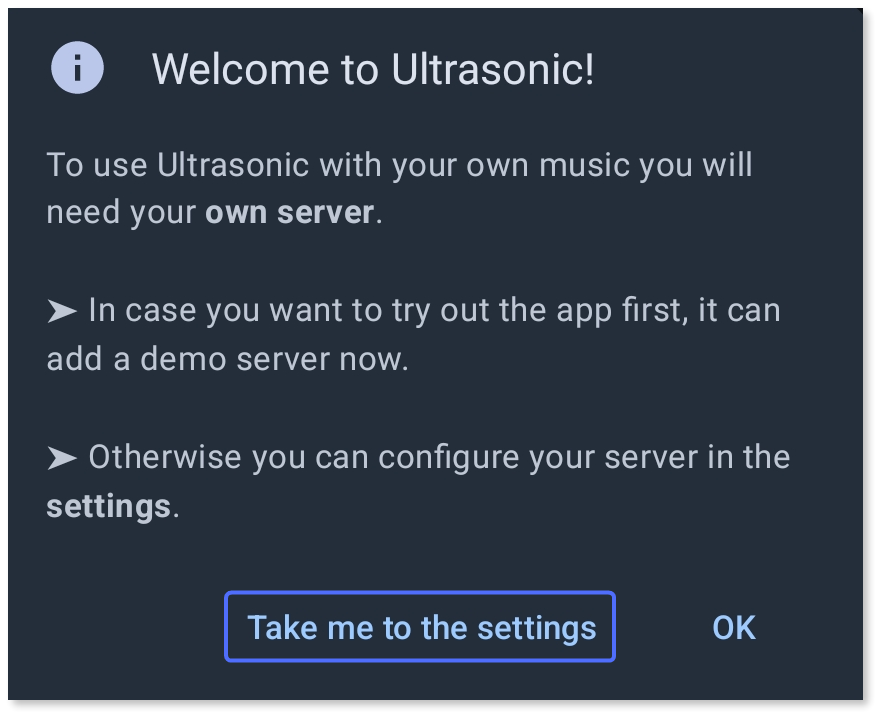
To connect to your Airsonic server using the Ultrasonic app for Android:
1. Install Ultrasonic from the [Google Play Store](https://play.google.com/store/apps/details?id=org.moire.ultrasonic) and launch it.
2. In the **Welcome to Ultrasonic!** pop-up window, tap **Take me to the settings**.
3. In the lower-right corner, tap the plus (+) button.
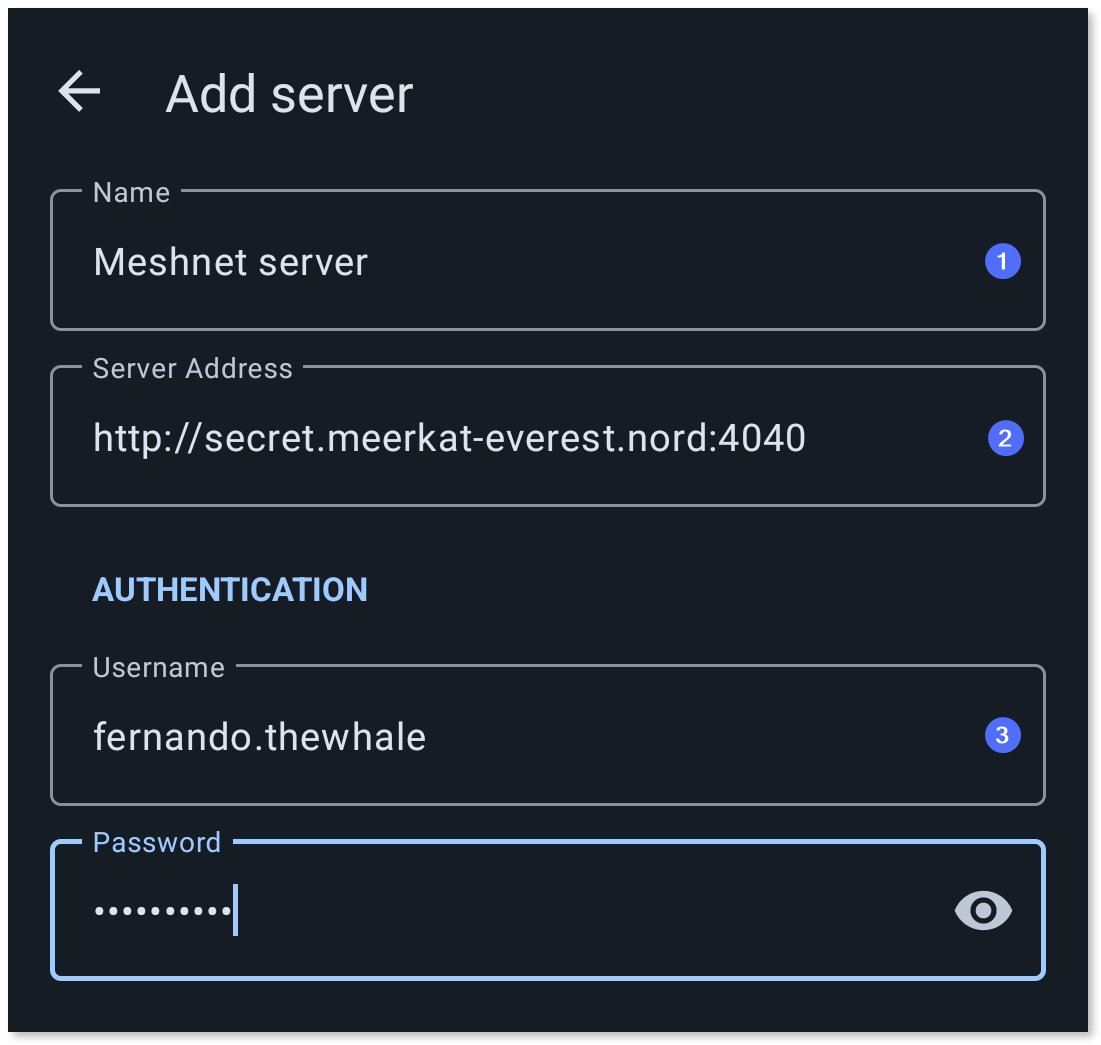
4. In the **Add server** screen, fill in the following information:
* In the **Name** field, enter a custom name for your server.
* In the **Server address** field, append the Nord name of your Airsonic server followed by `:4040`.
* In the **Username** and **Password** fields, enter the user credentials for your Airsonic server account.\
\
**Example**
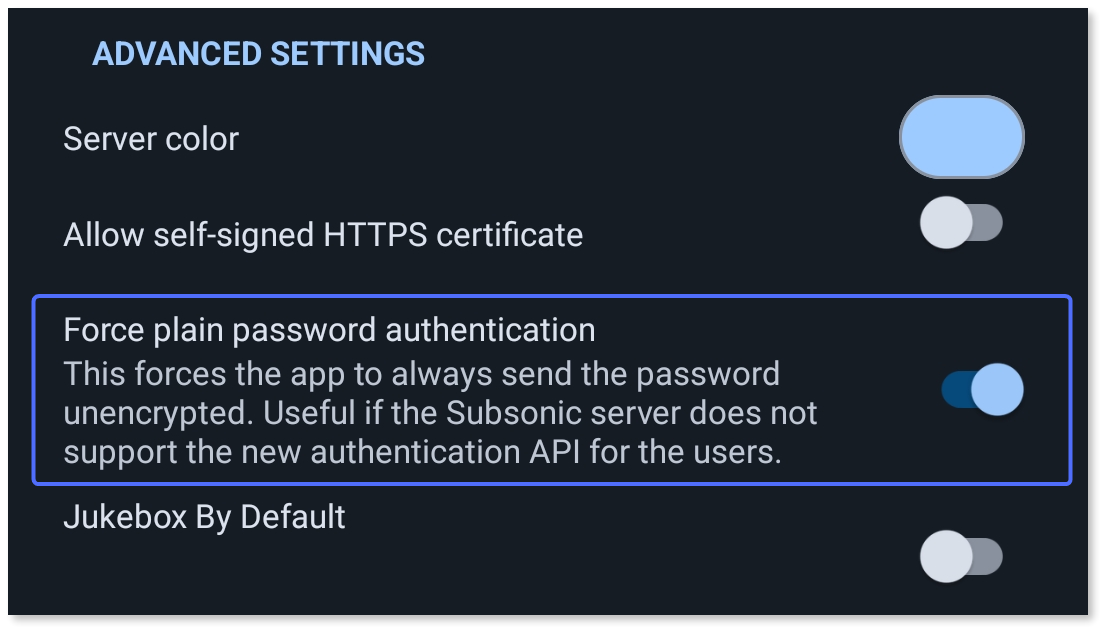
5. Enable the **Force plain password authentication** toggle.
6. Tap **Test connection** to ensure that you can reach your server and tap **Save**.
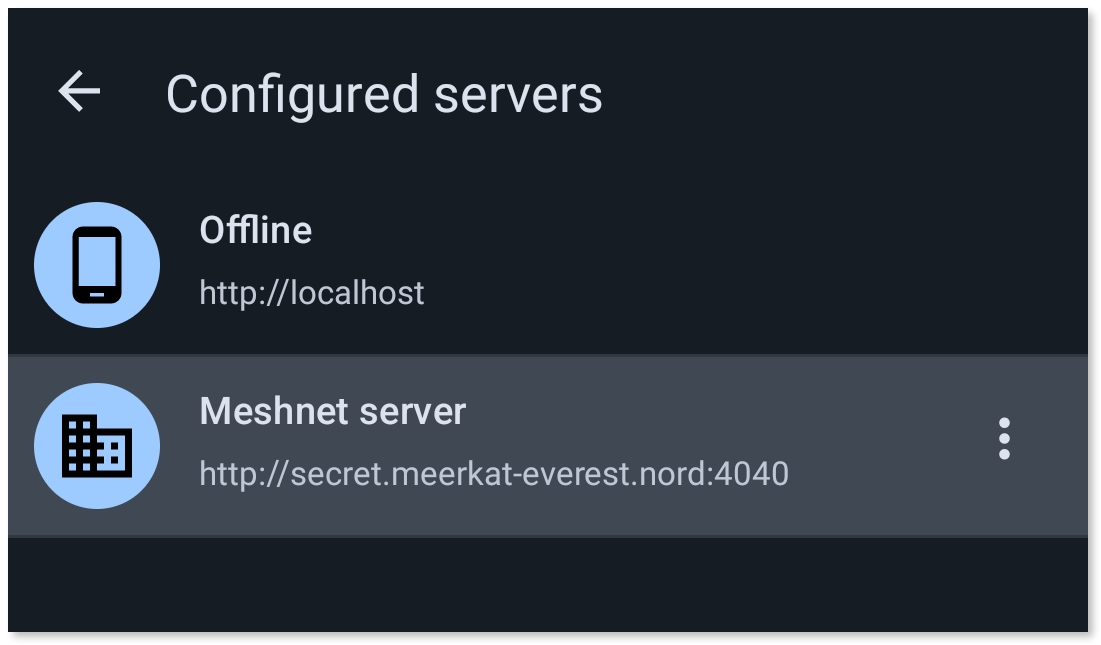
7. From the **Configured servers** list, select your newly added server.
Now you can navigate your music library and play selected recordings directly from the Ultrasonic app.
{% endtab %}
{% tab title="iOS" %}
To connect to your Airsonic server using the iSub app for iOS:
1. Install iSub from the [Apple App Store](https://apps.apple.com/us/app/isub-music-streamer/id362920532) and launch it.
2. In the first field, enter `http://:4040`, replacing the Nord name with your Airsonic server’s Nord name.\
\
**Example**\
`http://secret.meerkat-everest.nord:4040`
3. In the **username** and **password** fields, enter authentication credentials for your Airsonic server account.
4. Tap **Save**.
5. Tap **App settings** and switch to the **Settings** tab.
6. Under **General**, turn on the **Enable basic authentication** toggle.
Now you can navigate your music library and play selected recordings directly from the iSub app.
{% endtab %}
{% endtabs %}